Drag & Drop Multiple File Upload - WooCommerce
Last Updated : Nov 29, 2023Introduction
Drag and Drop Multiple File Uploader is a simple, straightforward WordPress plugin extension for WooCommerce, which allows the user to upload multiple files using the drag-and-drop feature or the common browse-file of your product page.
Plugin - Installation
1. To install a Plugin from a .zip file, login to your Wordpress dashboard and click Plugins → Add New
2. In plugin page you will find 'Upload Plugin' button where you can select and then Upload "drag-and-drop-file-uploads-wc-pro.zip" file.
3. The resulting installation screen will list the installation as successful or note any problems during the install.
4. If successful, click Activate Plugin to activate it, or Return to Plugin Installer for further actions.
Plugin Setup
1. In WordPress admin Dashboard go to 'WooCommerce → Settings → File Uploads '
Manage Account
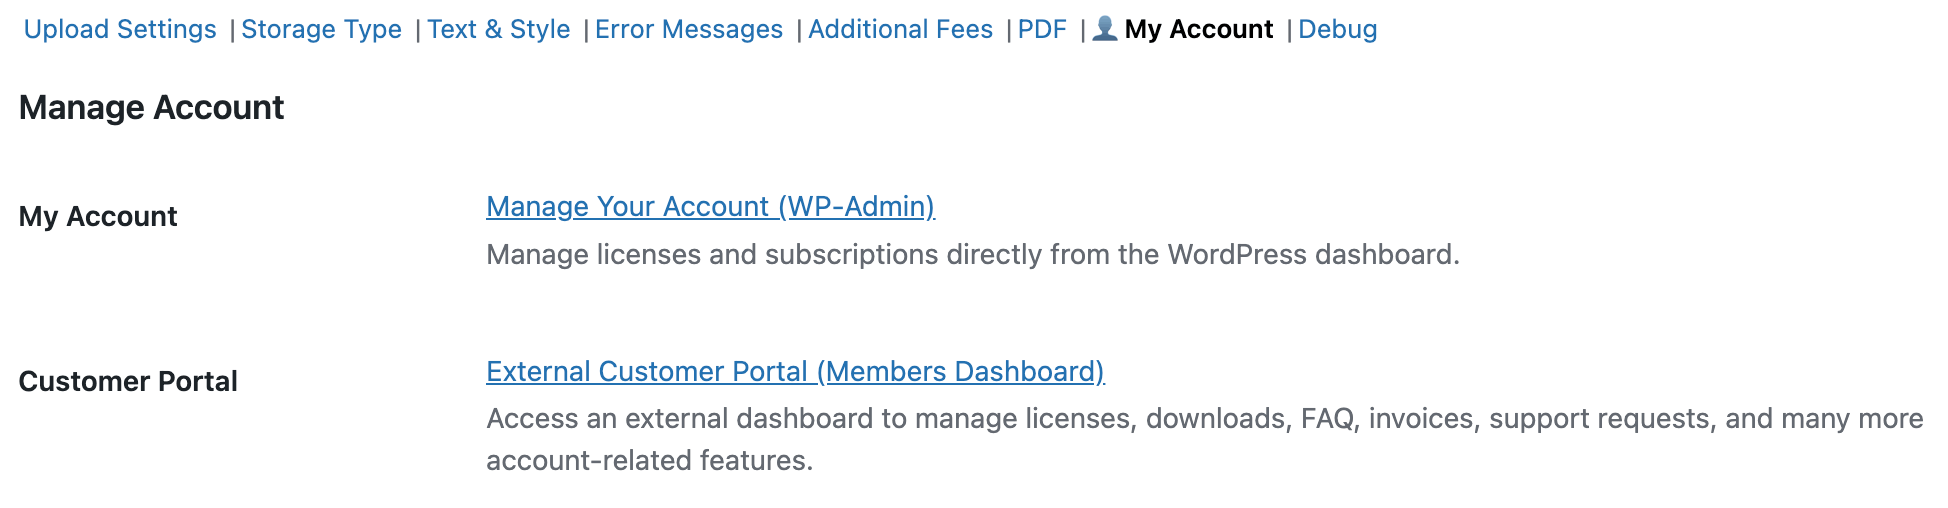
The My Account settings can be found in your WordPress dashboard under "WooCommerce → Settings → File Uploads → My Account".
Alternatively, you can access our customer portal and log in to manage your licenses, invoices, subscriptions, and more.
Change Upload Name
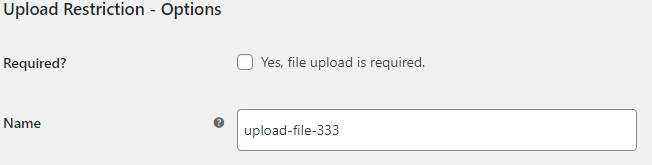
Go to “WooCommerce → Settings → File Uploads” in “Upload Restriction – Options” section there’s a field “Name” where you can add/change of the uploader name.
Change File Upload Text/Info
You can change text "Drag & Drop Files Here" or "Browse Files" text in WordPress Admin, it’s under “WooCommerce → Settings → File Uploads”.
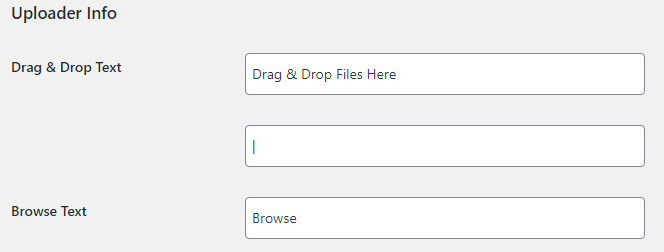
Change Upload Label
Go to “WooCommerce → Settings → File Uploads” in “Uploader Info” there’s a field “File Upload Label” where you can change/add a custom label.
This label will display before "Drag & Drop Upload" Area Field.

Limit "Max File Size" - of each file
To limit file size, go to “WooCommerce → Settings → File Uploads” scroll down and find “Upload Restriction” section.

On that section there’s a Text field “Max File Size (Bytes)” that you can specify File Size limit of each file.
(if this field empty, default is: 10MB)
Please also take note it should be Bytes you may use any converter just Google (MB to Bytes converter).
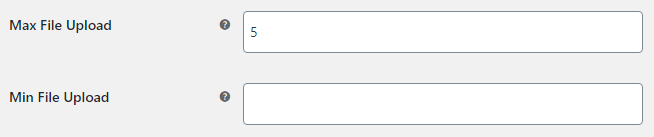
Set "Max" & "Minimum" Number of Files
To limit the Number of files go to “WooCommerce → Settings → File Uploads” find the “Upload Restriction” section and then add number in “Min/Max File Upload” field.
Add/Limit File Types
To add file types restriction, in “WooCommerce → Settings → File Uploads” scroll down and find the “Upload Restriction” section.
In ‘Supported File Types’ field, add File types/extensions you want to accept, this should be separated by (,) comma.

Example: jpg, png, jpeg, gif
Disable File Upload on specific product
Go to “Products” then “Edit” specifc products.
In “Product Data” box/widget click “File Uploads” tab then there’s an option that allow you disable the uploader.
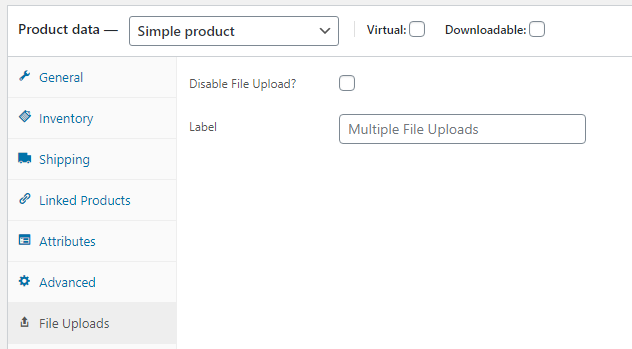
Change Label of individual product
Go to “Products” then “Edit” specifc products.
In “Product Data” box/widget click “File Uploads” tab on “Label” field add custom text for individual product.
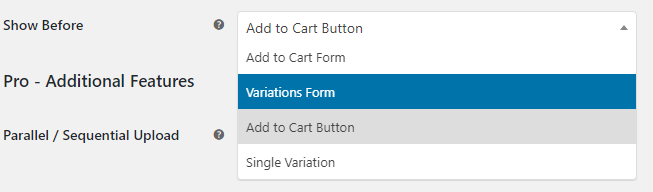
Show Uploader Before - Specific Section
Go to “WooCommerce → Settings → File Uploads” scroll down and find “WooCommerce Options” section.
In the "Show Before" option, choose which section on cart page you want to show/appear the "drag & drop uploader". (see screenshot)
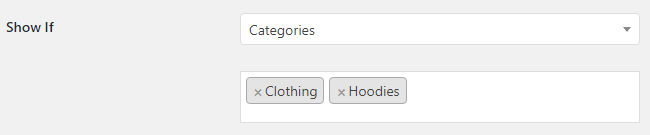
Show uploader based on (Categories, Products, Tags, Attributes)
Go to “WooCommerce → Settings → File Uploads” scroll down and find “WooCommerce Options” section.
In the "Show If" field, choose which specific ("Categories, Tags, Products, Attributes") you want the "drag & drop uploader" to show.
Set Max Total Size
Go “WooCommerce → Settings → File Uploads” scroll down and find “Pro - Additional Features” section.
In the "Max Total Size (MB)" field you can set max "Total File Size" limit of all uploaded files, if total size exceeds the limit it will display an error.

Zip Files
This options will (compress or zip) all of your files
Parallel / Sequential Upload
In the “WooCommerce → Settings → File Uploads” scroll down and find “Pro - Additional Features” section.
You have an option to set how many file uploads to process at the same time.
This has also helped to reduce resource usage on the server like ( memory usage, multiple server request )
Parallel / Sequential Upload - Specific Number of Files that will simultaneously Upload ( Partial batch of files that will uploaded to the server. )
Example: [Value is 2] You uploaded 10 files at once; the first & second files will be uploaded first and the remaining 8 will be on queue.

Chunks Upload
In the “WooCommerce → Settings → File Uploads” scroll down and find “Pro - Additional Features” section.
Chunks Upload - Provides a fast and reliable way to upload large files to Box by chunking them into a sequence of parts.
Chunk Size - The size of file that will be partially uploaded, If your file is smaller than that size, the upload will not be chunked.
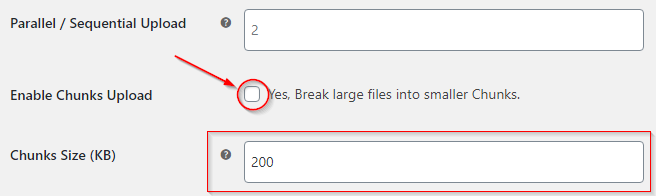
Note: The chunk size should be in KB format and must not be greater than the file size that has been set in the upload_max_filesize in the php.ini file.
Change Filename
Go “WooCommerce → Settings → File Uploads” scroll down and find “Pro - Upload Directory & Filename” section.
Modify or Amend file-name before uploading
Available Tags: Filename, Username, User ID, IP Address, Random, Date, Time, Product ID, Slug, SKU

Result: your-filename-woosku-34-jacket.png
Upload Folder
In Uploader Folder Option - This will create a custom folder and group files based on "Order Number, Random, Date, Time, Name or Customer ID"

Example: "/uploads/wc_drag-n-drop_uploads/order-2333"
Upload Directory
Change base upload directory where the files are being stored. (default inside "/wp-content/uploads")

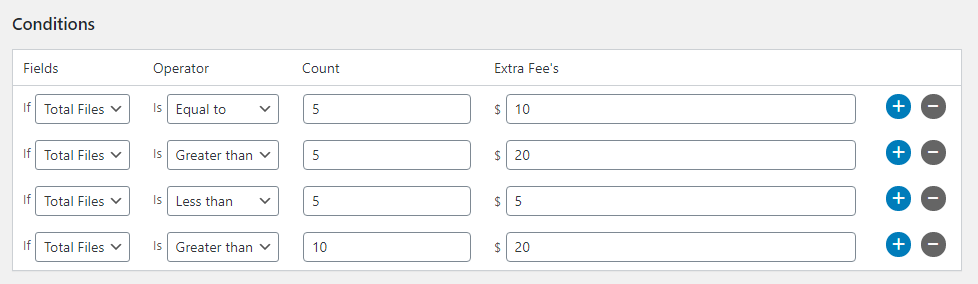
Custom Fee's
To add custom fees - Go “WooCommerce → Settings → File Uploads” select "Additional Fees" tab.
You'll be able to add custom fee based on the total number of uploaded files for each product.
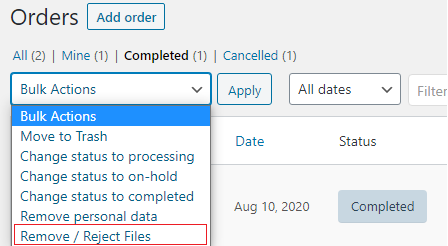
Remove/Reject Files
You also have an option to remove/reject files on created order.
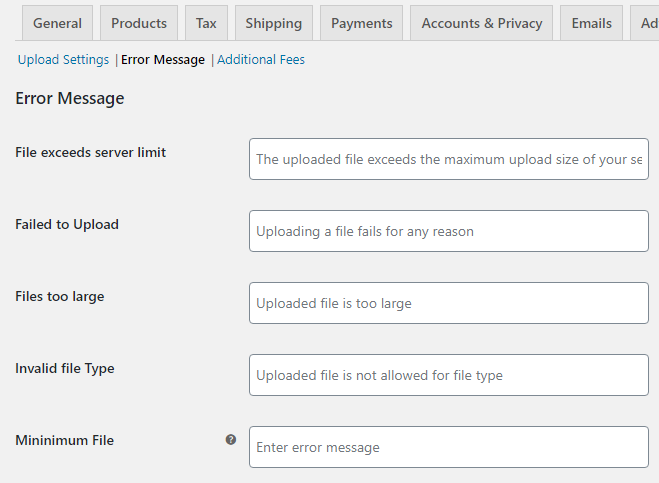
Edit Error Message
All error message can be managed in “WooCommerce → Settings → File Uploads” ‘Error Message’ tab.
Remote Storage
This option allows you to choose between local and remote storage options. If remote storage is selected, it will provide the option to save files to FTP, Dropbox, Google Drive, or Amazon S3.

→ FTP
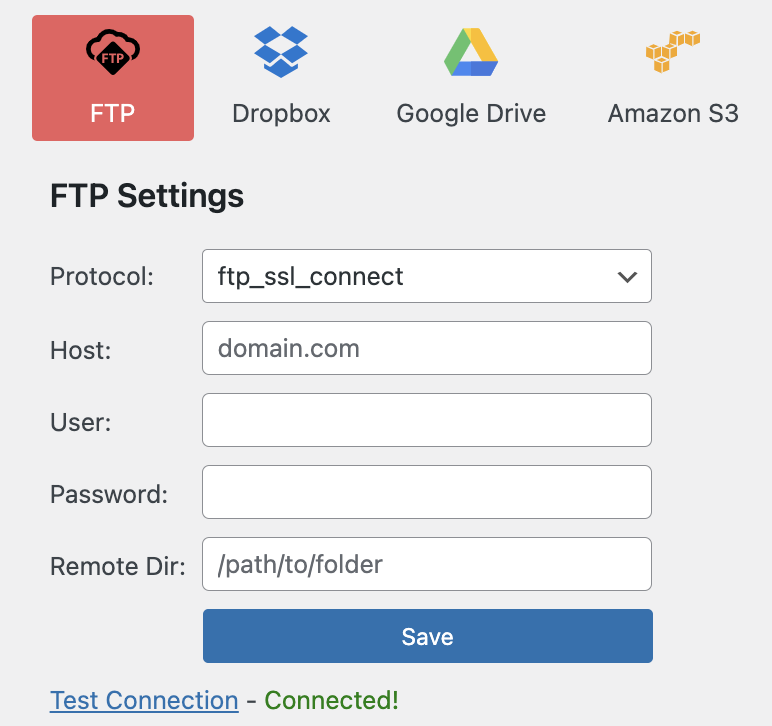
Host - For the host, you may use either the server's IP address or its domain name. (ie: domain.com or 198.187.29.33)
User - Enter your FTP username.
Password - Enter your FTP password.
Remote Dir - Copy full path from filezilla or any FTP application. (see below)
Example: Copy this 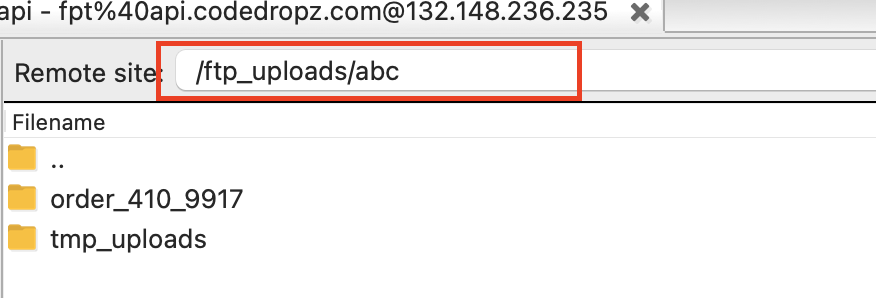 paste it to →
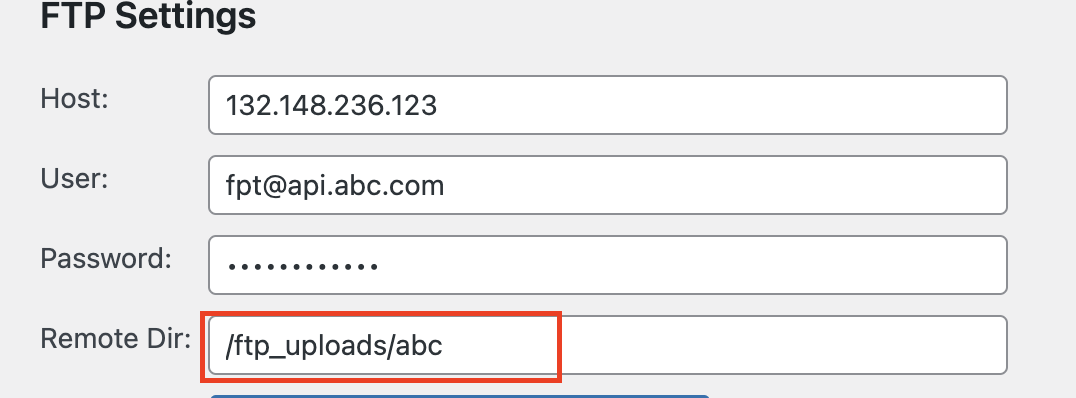
After you have added all the details click save and make sure to click "Test Connection" button
→ Dropbox

For Dropbox integration, you only need to provide the App Key, App Secret, and Folder Name. Please ensure that the Folder Name has been created on Dropbox beforehand.
After clicking the Save button, proceed to steps 1-3 in the admin options.
Tutotial : https://youtu.be/O_vgeXGNiRE
→ Google Drive
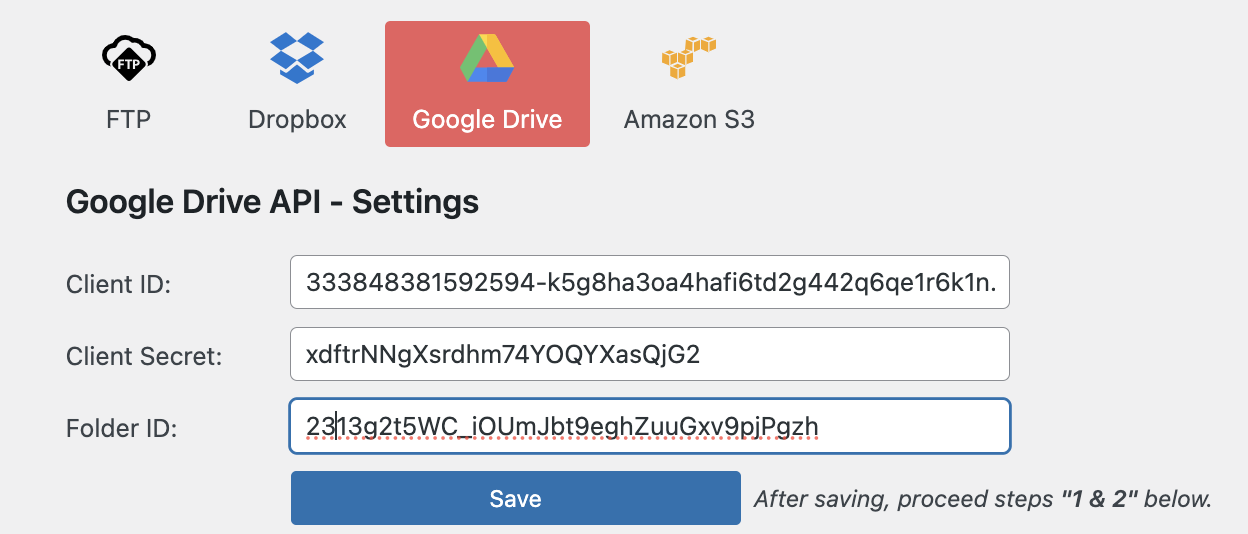
For Google Drive integration, you only need to provide the Client ID, Client Secret, and Folder ID. Please ensure that you have already created a folder name in your Google Drive to obtain the folder ID.
How to determine Folder ID? Navigate to your folder in Google Drive. For example, if the URL was “https://drive.google.com/drive/folders/1dyUEebJaFnWa3Z4n0BFMVAXQ7mfUH11g”, then the Folder ID would be “1dyUEebJaFnWa3Z4n0BFMVAXQ7mfUH11g”.
After clicking the Save button, proceed to steps 1-2 in the admin options.
Tutotial: https://www.youtube.com/watch?v=GP9CE05yTew
Demo: Watch Demo
→ Amazon S3
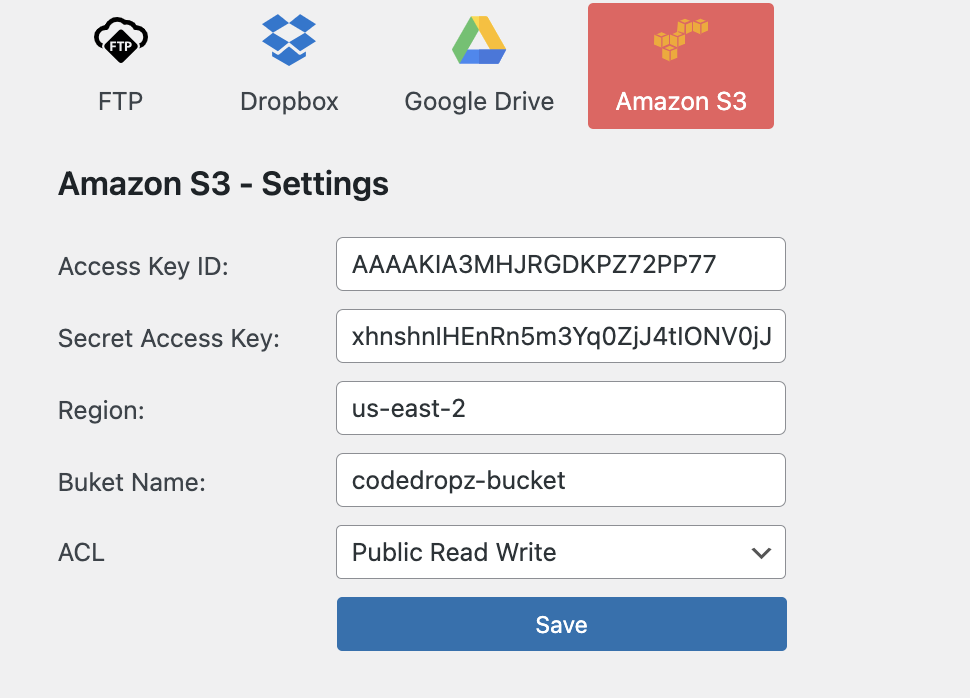
To obtain the access key and secret key, please follow the tutorial below. Additionally, double-check that the region, bucket name, and ACL match the details in AWS.
When you make an S3 bucket public in AWS, it means that anyone with the bucket's URL can access the files in it. However, you may still encounter the “Access Denied” issue when trying to access a file in the bucket. This is because even though the bucket is public, the files within it are still private by default.
Tutotial: How to generate Access Key ID & Secrete Access Key
Support / Request
For any assistance or customization request, you can contact me through my email : [email protected]